Just bought your first RV? Don’t make the same costly mistakes we did!
Picture this: brand new RV owners pulling into their first campground, completely clueless about what they’re doing. That was us! We’re talking about backing in disasters with everyone watching, hitting boulders with our truck (hello $180 wheel cover replacement!), and Barry dealing with a poopsie situation trying to figure out the waste tanks as our stress levels went through the roof.
When we started RVing, we had ZERO experience and made every disaster you can imagine. After almost three years of adventures (and plenty of expensive learning moments!), we’ve figured out exactly what new RVers need to know to skip the disasters and get straight to the good stuff.
Whether you’re planning your first weekend getaway or dreaming of longer adventures, these 6 trip-ruining mistakes could save you thousands of dollars and tons of embarrassment. Trust us – we learned these lessons the hard way so you don’t have to!
Mistake #1: Assuming Your Truck Can Pull Anything
Just because you have a big truck doesn’t mean it can safely pull any trailer. This was one of our first confusing realizations when we bought our massive 44-foot toy hauler. We thought, “Big truck + big trailer = we’re good to go!” Wrong.
The Reality Check: You need to understand towing capacity versus actual trailer weight. We’ve seen countless RVers at campgrounds with their trucks sagging under too much weight – it’s dangerous and could lead to accidents.
How to Avoid This:
- Check your truck’s actual towing capacity online
- Know your trailer’s real weight (not just the manufacturer’s dry weight)
- Factor in all your gear, water, and supplies
- When in doubt, get it weighed at a truck stop
The Stakes: Overweight towing isn’t just unsafe – it can cause tire blowouts, transmission damage, and put you and other drivers at risk.
Mistake #2: Ignoring Tire Safety (A $2,000+ Disaster Waiting to Happen)
 RV tire blowouts aren’t just inconvenient – they can cause thousands of dollars in damage to your RV. When that rubber flies off and hits your RV, it can damage your exterior, your tanks, and turn your dream vacation into a nightmare.
What We Learned the Hard Way:
- RVs sitting for months need tire pressure checks before every trip
- Hot tires are about to blow – and you won’t know without monitoring
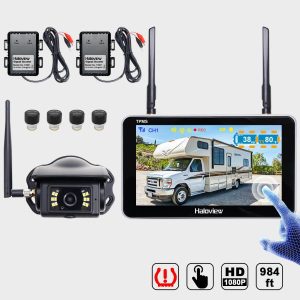
- A TPMS (Tire Pressure Monitoring System) is essential, not optional
Our Recommendation: We swear by the Haloview TPMS and backup camera combo. It monitors tire temperature and pressure, sending alerts to your truck before disaster strikes. The peace of mind is worth every penny.
Pro Tip: If your RV has been sitting, get those tires up to pressure and visually inspect them before hitting the road. It’s a small step that prevents major disasters.
Mistake #3: The Backing In Nightmare (And How to Avoid Looking Like a Fool)
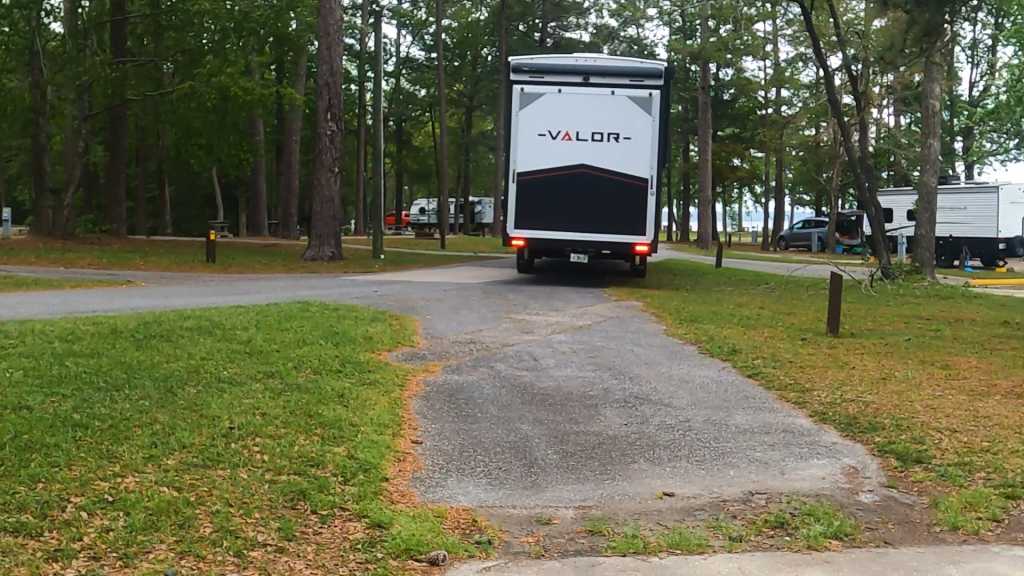 In our early days, Barry would literally pray for pull-through sites because backing in was terrifying. Picture this: Friday evening, busy campground, everyone watching as you attempt to back a massive RV into a tight spot while traffic builds up behind you.
Nashville Boulder Disaster: We’ll never forget the Nashville campground with boulders lining a super tight spot. Barry swung around trying to get our RV in and BOOM – hit a boulder, damaging our wheel cover. $180 later, we learned an expensive lesson.
How to Master Backing In:
- Practice at home first – don’t learn on a busy Friday at a packed campground
- Use clear communication – say “driver side” and “passenger side” instead of “left” and “right”
- The spotter should always stay visible in the driver’s mirrors
- Take your time – “slow is pro” as our friends at Keep Your Daydream say
- Watch helpful backing videos before your trip
It’s Okay to Ask for Help: Don’t be too proud to ask fellow campers for assistance. We’ve never had anyone turn us down – the RV community is incredibly helpful!
Know When to Walk Away: If a site is too tight and stressing you out, find another spot or campground. No site is worth damaging your rig or your sanity.
Sleep Better on the Road
 Speaking of RV disasters – let’s talk about the disaster of sleeping on a terrible RV mattress! We can’t tell you how many nights we’ve spent tossing and turning on uncomfortable beds during our travels. That’s why we’re huge fans of RV Mattress by Brooklyn Bedding.
Whether you’re upgrading your current rig or outfitting a new one, a quality mattress makes all the difference between waking up refreshed for your adventures or feeling like you got hit by a truck. They make mattresses specifically designed for RVs in all those weird sizes (you know what we’re talking about!), from cooling options for hot sleepers to different firmness levels for every preference.
Get 30% OFF your next mattress from RV Mattress by Brooklyn Bedding using code: liketheresnotomorrow
Mistake #4: Leveling Disasters (When Your Tires Leave the Ground)
You finally get parked and think “Great! Jacks down, let’s unhook.” But not all sites are created equal. Even the nicest resorts can have uneven pads, and what happens when you’re really unlevel can be shocking.
The Problem: On really uneven sites, auto-leveling systems can actually lift your tires off the ground trying to get level. Your panel might error out, and if you’re in a travel trailer trying to level manually, you’re looking at a frustrating puzzle of “right side lower, left side higher.”
The Solution – Leveling Blocks:
- Camco leveling blocks work great and stack easily
- Some RVers prefer Anderson blocks or even make their own with 2x4s
- Get a light-up level – green means level, red means adjust
Pro Strategy: If you’re really off, drive your tires up onto blocks first. This gives your leveling system a head start and prevents extreme adjustments.
Remember: You need to be level enough, especially with slide-outs, but don’t stress about perfection. A tiny bit off won’t hurt anything.
Practice Makes Perfect: Learn your leveling system at home where there’s no pressure, no audience, and no Friday evening stress.
Mistake #5: Water Hookup Disasters
 Just hook up the hose and turn it on, right?” Wrong! This seemingly simple step can cause expensive damage if you’re not careful.
Essential Water Setup Rules:
- Buy a 50-foot hose – you never know what you’ll encounter (like when the spigot is on the wrong side of your RV)
- Always use a water pressure regulator – some RV park pressure can literally peel paint
- Get a quality water filter – trust us, you don’t want to taste what comes out of some spigots
The Correct Order:
- Attach pressure regulator to spigot first
- Add your water filter after the regulator
- Connect your hose
- Before turning on water: Go inside and open a faucet to relieve pressure
- Turn on water gradually
Why This Matters: High water pressure can damage your RV’s plumbing system, and we’ve seen visibly dirty water at some parks. A simple inline filter makes all the difference for weekend warriors, while full-timers might want the three-stage filtration system.
Mistake #6: Electrical Problems That Can Fry Your RV
Assuming all RV parks have 50-amp service? Think again. Older parks and state parks often only have 30-amp, but that’s okay if you’re prepared.
Essential Electrical Safety:
- Always carry power adapters (dogbone adapters) for different amp services
- Surge protector is non-negotiable – we recommend the Power Watchdog
- Bad electrical can destroy thousands of dollars in RV electronics
Our $800 Lesson: We’ve had two Power Watchdog units get burned up from electrical problems. Once, the unit was slightly pulling out of the pedestal, causing a poor connection. Now Barry always uses bungee cords to keep everything flush.
Proper Connection Sequence:
- Make sure pedestal power is OFF
- Turn off all RV air conditioners
- Plug in surge protector (without RV cord attached)
- Turn on pedestal power
- Check surge protector indicators (green = good, red = danger)
- If green, turn off power, attach RV cord, turn back on
- Turn on air conditioners one at a time
Red Light = STOP: If your surge protector shows problems, don’t plug in. Ask the RV park to check the pedestal. It’s better to be safe than sorry with a $20,000+ repair bill.
Watch our video on our electrical issue situation HERE.
Mistake #7: Conquering the Poop Fear
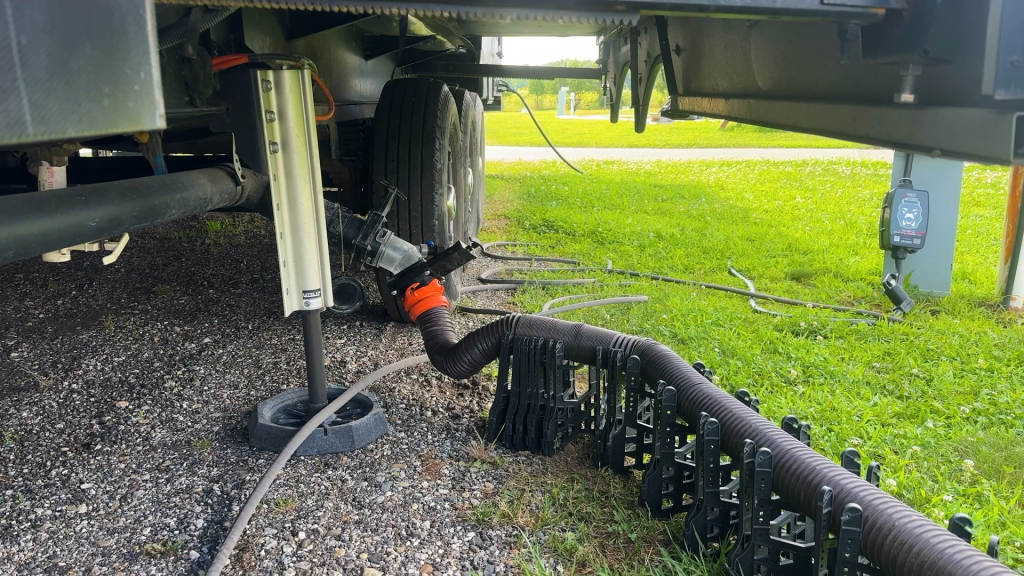 Let’s talk about the elephant in the room – or should we say, the poop in the tank? Many new RVers are so scared of the waste system they avoid using their RV bathroom entirely. That’s crazy! Having your own bathroom is one of the best parts of RVing.
Tank Basics:
- Gray tank: Shower and kitchen sink water
- Black tank: Toilet waste
- Golden Rule: Keep all valves CLOSED until you’re ready to dump
Why Closed Valves Matter: If you leave them open, waste flows through immediately, leaving solids behind to create a dreaded “poo pyramid.” Dry tanks are bad tanks!
Toilet Etiquette Rules:
- Always fill the toilet bowl with water before use
- Don’t overdo the toilet paper (teach kids this rule!)
- Use a toilet treatment product to break down waste (We like Liquified RV Treatments)
Dumping Process (It’s Not That Scary!):
- Always wear gloves – seriously, we’re amazed how many people don’t
- Consider an extra valve for additional protection
- Pull gray tank slightly first to test for leaks
- Then pull black tank completely
- Finish with gray tank to rinse the hose
Pro Tip: Gray water going through the hose first is much better than black water if something drips when you disconnect!
Final Setup and Safety Tips
Awning Awareness: Wind and rain can destroy awnings in minutes. We learned this the hard way in Oregon when a rogue wind sent our awning flying, causing costly damage. Always bring awnings in if you’re leaving or if weather threatens.
Pet Safety: Never leave pets in a hot RV! Use a temperature monitoring system like Waggle that alerts you if power is lost or temperatures get dangerous.
Kids and Pets During Setup: Keep them in the vehicle with AC until you’re fully set up. You need to concentrate, and they need to stay safe.
You’ve Got This!
Remember, everybody was new once. We went full-time having never RVed before, so we made ALL the mistakes. The good news? It gets easier every time. Before you know it, you’ll be pulling into campgrounds, setting up efficiently, and actually enjoying yourself instead of stressing about every step.
These mistakes might seem overwhelming, but each one is completely avoidable with a little knowledge and preparation. Take your time, practice at home when possible, and don’t be afraid to ask for help from fellow RVers.

Dreaming of Full-Time RV Life? Check out our complete full-time RV course for everything you need to know about transitioning to life on the road full-time.
The RV community is incredibly welcoming and helpful. We’re all in this together, learning from each other’s mistakes and celebrating each other’s adventures. Now get out there and start making those amazing memories – just skip our expensive learning curve!
What newbie mistakes did you make? Share your stories in the comments below – we’re all learning together!