The Real Cost of Victron: My $14,000 Lesson
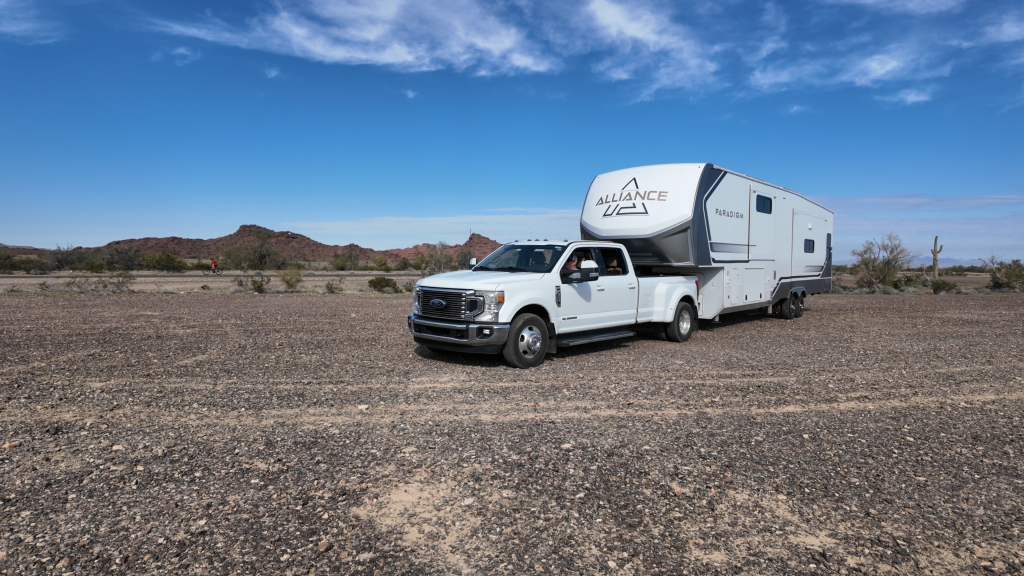
After 4 years of full-time RVing and investing $14,000 in a traditional Victron solar system in our first RV (44-foot Alliance toy hauler,), we made a major decision: we switched to the new Bluetti RV5 for our newest RV (a 40-foot Alliance 5th wheel). Before you dismiss this as just another product review, hear me out—this is what actually happens when you live with this system off-grid for real.
When we installed our Victron system in our first RV, I learned two important lessons:
1. Victron systems are complex. We purchased all the components separately: a Multiplus II inverter, a solar charge controller, and numerous cables. When I looked at the massive pile of electrical equipment, I quickly realized I was in over my head. I hired a professional solar installation company to handle it for $5,000 in labor alone, on top of the equipment costs.
2. They don’t transfer between RVs. When we sold our toy hauler and upgraded to a 40-foot fifth wheel, we couldn’t take the system with us. Most people don’t bother removing Victron systems when selling their RV—they just leave them for the next owner. That meant investing in an entirely new solar setup.
This is where the Bluetti RV5 comes in.
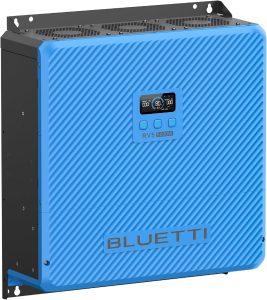
What Makes the Bluetti RV5 Different
 The RV5 is the Bluetti first integrated power system that’s actually designed specifically for RVs—not modified from another application. Here’s what sets it apart:
Everything Comes in One Box
Unlike Victron’s modular approach, the Bluetti RV5 arrives with:
- 2 large battery units (each weighing over 100 pounds)
- The RV5 inverter/charger unit
- All pre-marked cables with clear connection instructions
- All necessary components for installation
No Guesswork on Component Sizing
With Victron, you need extensive knowledge to:
- Choose the correct cable sizes
- Match the right solar controller to your setup
- Ensure all components work together properly
The Bluetti RV5 eliminates this complexity. You order one system, it ships in one box, and you install it. No need to hunt down compatible components or worry about mismatched specifications.
Built-In DC-to-DC Charger
One feature I didn’t expect was the RV5’s internal DC-to-DC charger. If you use the PV2 input, you can charge your house batteries from your vehicle’s alternator while driving—even in cloudy weather or at night. This is a feature you’d have to add separately with a traditional Victron setup.
The Bluetti RV5 Specifications
Here’s what you’re working with:
- System Voltage: 48V (very efficient)
- Battery Configuration: Ships with 2 batteries; we added a 3rd for additional capacity
- Total Battery Weight: 300+ pounds (for 3 units)
- Solar Input: Two PV inputs (PV1 and PV2) for multiple solar arrays
- Our Solar Setup: 1,600 watts of rooftop solar panels across two arrays
- Installation: Requires mounting, battery configuration, and electrical integration with your RV’s transfer switch
- Coming Soon: Bluetti is already working on a second version; we don’t have details yet, but it may include genuine two-leg (50A) capability
Important Limitation for 50A RVs
The Bluetti RV5 is a single-leg system, not a true 50A system. Traditional 50A RVs have two hot legs (25 amps each). The RV5 operates with only one hot leg.
Here’s why this isn’t a deal-breaker for us:
A lot of people make a big deal out of the RV5 not being “true 50 amp”. Here’s why that doesn’t really matter to us when we’re boondocking:
- We don’t use the washer/dryer (not installed)
- We don’t use the dishwasher (not installed)
- We don’t use electric heat (it drains batteries too quickly; we use propane instead)
- We rarely ever use AC when boondocking, and if we do, we use efficient AC units like the Turbo Greenland (which runs on just 475 watts)
Standard RV breaker panels alternate between leg 1 and leg 2 (leg 1, leg 2, leg 1, leg 2, etc.). So we had to rearrange some breakers to ensure the loads we actually use were on the active leg, but once done, this was a one-time modification. When we’re plugged into shore power, both legs work as normal.
Real-World Performance: Living Off-Grid in Arizona
 We’re currently boondocking in the Desert Mountain region of Arizona in January—the weakest solar season due to the sun staying closer to the horizon. Despite this challenging timing, here’s what we’re running:
Successfully Powered:
- Computers and work equipment
- TV
- All DC loads and outlets
- Microwave and air fryer
- Toaster
- All onboard electronics
- All outlets
Solar Production: Even in winter, we’re consistently generating 400-500 watts from our rooftop solar panels.
Air Conditioning: All three of our air conditioners can technically power on with the RV5, but we rarely use them. In January in Arizona, the temperature reaches about 80°F during the day, and a breeze keeps things comfortable. In the past, we’ve went six months without turning on air conditioning when boondocking. However, if you’re boondocking in hot, humid climates (like the East Coast), you’d want to invest in an efficient AC unit like the Turbo Greenland rather than traditional power-hungry units.
Bottom Line: We’re doing everything we set out to do without stress or strain.
Installation: What You Need to Know
If you’re considering the Bluetti RV5, here’s what the installation process involves:
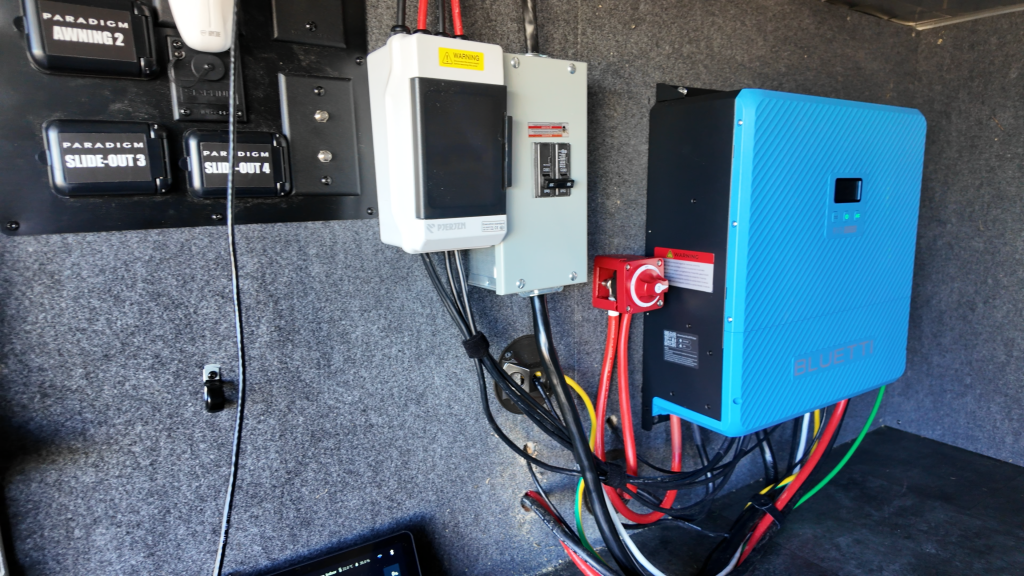
Mounting Considerations
- The RV5 unit is a large square unit that requires adequate ventilation
- We mounted ours in the main storage bay because it wouldn’t fit in the standard battery bay
- Weight distribution matters: 3 batteries total 300+ pounds
- We reinforced the mounting area with plywood for stability
Electrical Integration
The installation requires integration with your RV’s transfer switch:
- The RV5 connects to your transfer switch and is recognized as an external generator
- When shore power is available, the system draws from shore power and charges the RV5 batteries.
- When you disconnect from shore power, the transfer switch automatically switches to the RV5
- You’ll need to potentially rearrange breakers to match the single-leg configuration
Tools & Materials You’ll Need
Sme things I couldn’t find at local stores, so I made this special Amazon list for what I ordered to complete the install.
- Pneumatic crimper (for making battery jumper cables)
- Heat gun (for heat-shrinking connections)
- Plywood and fasteners (for reinforcement)
- Electrical expertise (or hire a mobile RV technician)
Battery Cable Setup
One point of friction: Bluetti doesn’t provide short jumper cables between batteries. You’ll need to make these yourself, which requires crimping skills. Not a deal-breaker, but worth knowing upfront.
Bluetti RV5 vs. Traditional Victron Systems: The Comparison
| Feature | Bluetti RV5 | Victron (Multiplus II Setup) |
|---|---|---|
| Installation Complexity | Moderate (pre-integrated) | High (multiple components) |
| Cost to Install | DIY possible; professional tech: $1,000-2,000 | DIY possible, but professional install more likely: labor $5,000+ |
| Component Selection | All included | Must research & match separately |
| DC-to-DC Charger | Built-in | Requires separate purchase |
| System Voltage | 48V | Variable (typically 12, 24, or 48V) |
| True 50A Capability | No (single leg) | Yes (dual leg available) |
| Portability Between RVs | More feasible than Victron | Difficult to transfer |
| Learning Curve | Moderate | Steep |
Is the Bluetti RV5 Worth It?
My verdict: Yes.
We’re living the life we set out to live—boondocking wherever we want, powering all our essential equipment, and doing it without constant battery drain anxiety. The system has been working flawlessly for real-world off-grid living.
However, it’s not perfect:
Pros:
 Designed specifically for RVs One integrated system vs. multiple components Built-in DC-to-DC charger Easier than Victron for non-tech folks Efficient 48V system Excellent real-world performance
Cons:
 Single-leg system (not true 50A) Requires electrical knowledge or professional help to install Battery jumper cables must be made yourself Solar input power limitations on each PV input Epanel doesn’t really work for 50A RV’s. Must install and/or wire transfer switch to work with it.
What’s Next for the Bluetti RV5?
Bluetti has confirmed they’re working on a second version. We don’t have specifics, but it may include:
- Genuine two-leg (50A) capability
- Potentially increased solar input capacity
They’ve promised to send us a test unit when it’s available, and we’ll absolutely review it.
How to Get the Bluetti RV5
 If you’re ready to make the switch:
Our Recommendation: Buy directly from Bluetti rather than through a reseller. You’ll want the peace of mind that comes with buying directly from the manufacturer for such an expensive item.
Our Discount: Use the affiliate link below for 5% off your purchase. Use the code AFF5OFF at checkout.

The Bottom Line
After living full-time in RV’s for 4 years and investing $14,000 in a Victron system in our previous rig, we can confidently say the Bluetti RV5 is a genuine alternative. It’s not a perfect system, but it’s the best integrated power solution we’ve found that’s specifically designed for RVs.
We’re making it our goal this year to boondock as much as humanly possible—and the Bluetti RV5 is making that possible without the complexity and cost we experienced with Victron.
More From Our Bluetti RV5 Series
- Video 1: Complete Bluetti RV5 System Overview
- Video 2: Bluetti RV5 Installation & Setup
- Bonus: Turbo Greenland AC Review for RV Boondocking
Have questions about the Bluetti RV5 or your own RV power setup? Drop a comment below. I try to answer every question I can. And if you’re ready to learn everything about transitioning to full-time RV living, check out our Going Full-Time RV online course with support from our private community.
Subscribe to follow our boondocking adventures and see how this system performs across different climates and conditions throughout the year.