IMPORTANT DISCLAIMER: This is an advanced RV modification that requires careful implementation. Please watch our entire video demonstration before attempting this setup. Improper installation could result in leaks and spills. We are not experts – this is simply what works for us. Proceed at your own risk and always test with gray water first.
The Most Controversial RV Setup We’ve Ever Shared – Now Even Better!
When we posted our original video about our collapsible waste tank solution for boondocking, we had no idea it would generate so much attention. Thousands of views and hundreds of comments later, we’ve learned that RVers have strong opinions about waste management!
Some of you thought we were absolutely crazy. Others wanted to know exactly how to replicate our setup. After listening to your feedback and making significant improvements to our system, we’re back with an update that addresses the most common questions and concerns.
Why Use a Collapsible Black Tank Tote?
 If you’re new to this concept, you might be wondering why we’d even consider this setup. For those who love boondocking (camping without hookups) or staying at beautiful locations without sewer connections (like the Army Corps of Engineers park in Eufaula, Alabama, where we filmed this update), waste management becomes a critical factor in how long you can stay.
The traditional solution is using rigid plastic totes that you fill from your RV’s dump valve, then transport to a dump station. The problems with these traditional totes are:
- Limited capacity – Most only hold 36-42 gallons
- Storage challenges – They take up valuable space in your tow vehicle or RV
- Multiple trips required – For larger RVs with multiple tanks, you need several trips
- Price – They’re not inexpensive
Our Improved Solution: The Collapsible Waste Tank
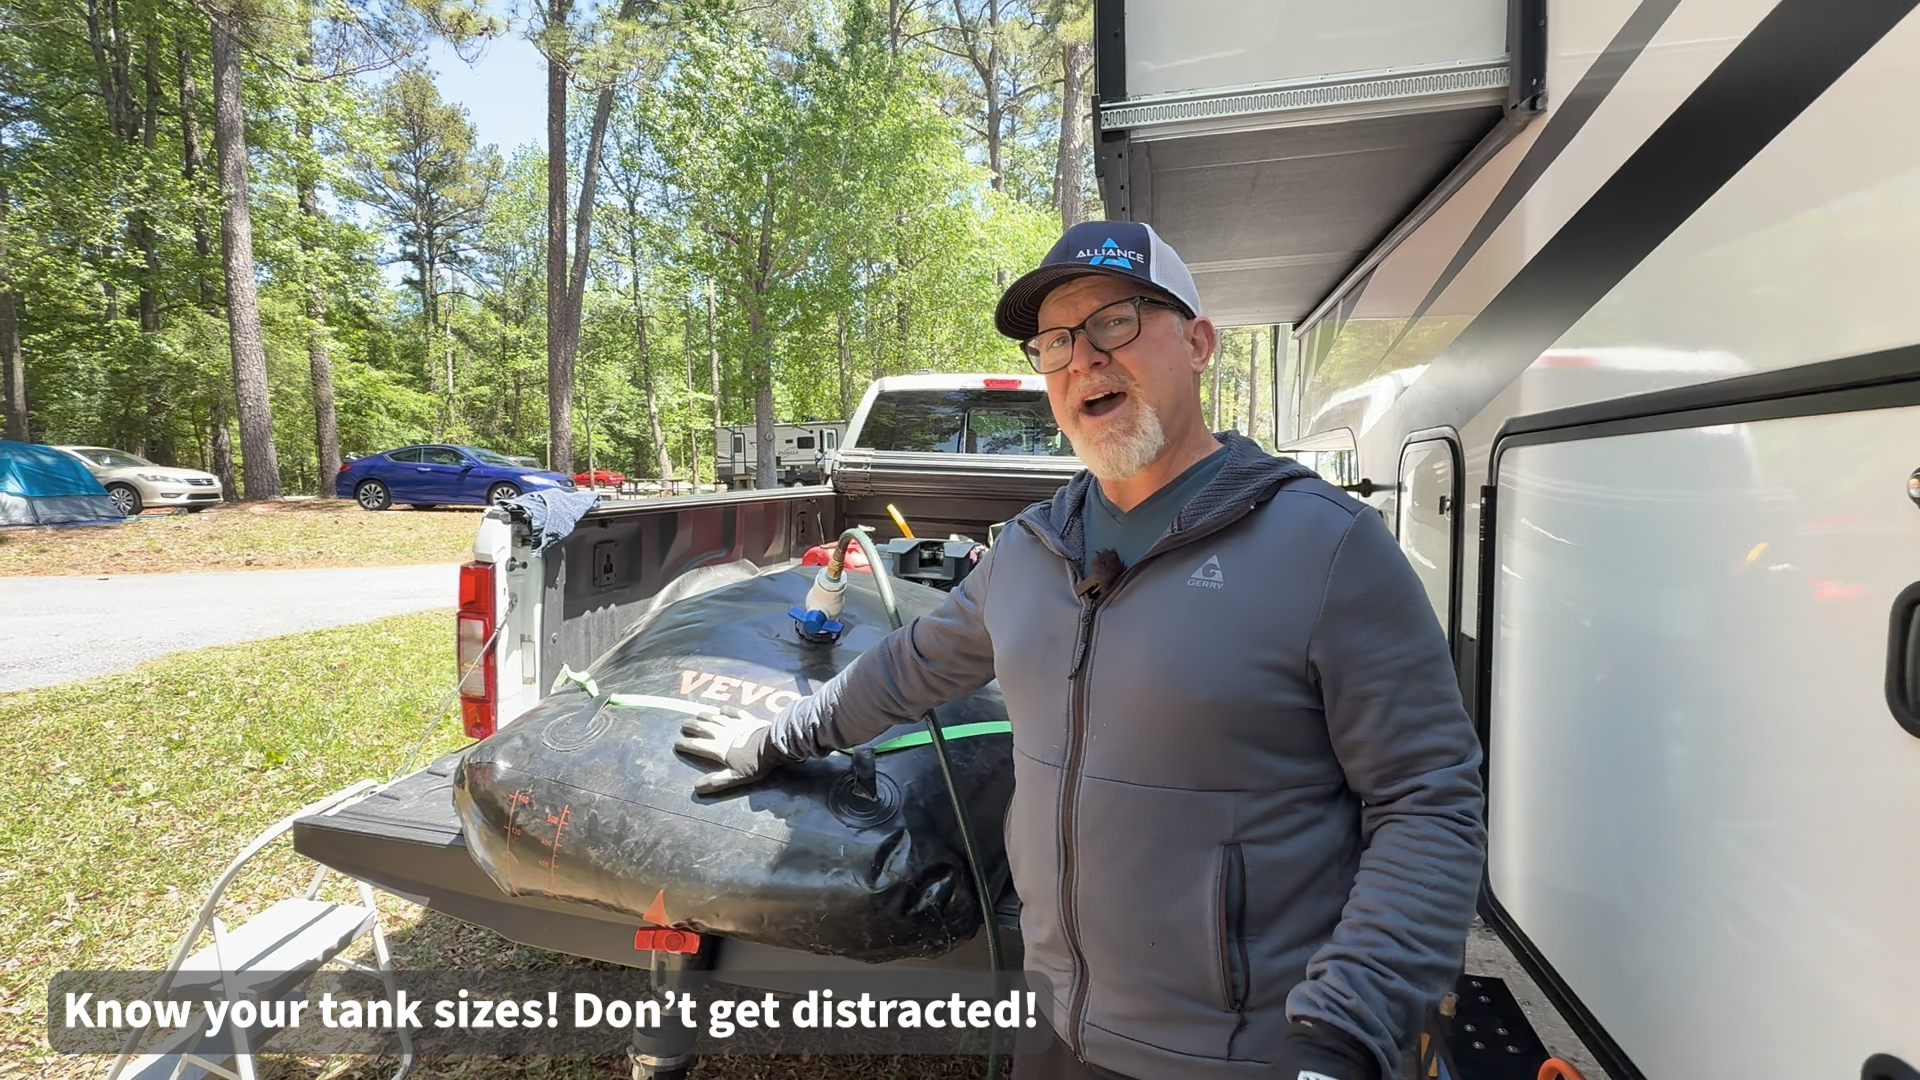
Our system uses a VEVOR 143-gallon collapsible water bladder, repurposed as a waste tank. With our 44-foot toy hauler’s multiple tanks (two 50-gallon black tanks plus gray), the large capacity means we can empty everything in a single trip.
What We’ve Improved Since Our First Video
Based on your questions and our own experience, we’ve made several crucial upgrades to our system:
- Better drain connection: We completely redesigned how the tank empties, allowing for MUCH faster draining at the dump station
- Simplified fitting system: We’ve found the exact combination of parts that works reliably without leaks
- Enhanced security setup: Better strapping system to keep everything secure during transport
- Improved venting technique: A small adjustment that makes emptying much faster
- Storage solution: A dedicated tote that keeps everything organized between uses
How It Works: The Complete Process
 Our setup uses a macerator pump to transfer waste from the RV tanks up into the bladder in the truck bed. Here’s the step-by-step process:
Setting Up & Filling
- Secure the bladder in your truck bed with straps BEFORE filling (critical step!)
- Open the vent valve slightly before filling to allow air to escape
- Connect your macerator pump to your RV’s dump valve
- Run the output hose from the pump to the bladder input fitting
- Turn on the pump and fill (takes about 20 minutes for 100+ gallons)
- Close the valve on the bladder when full
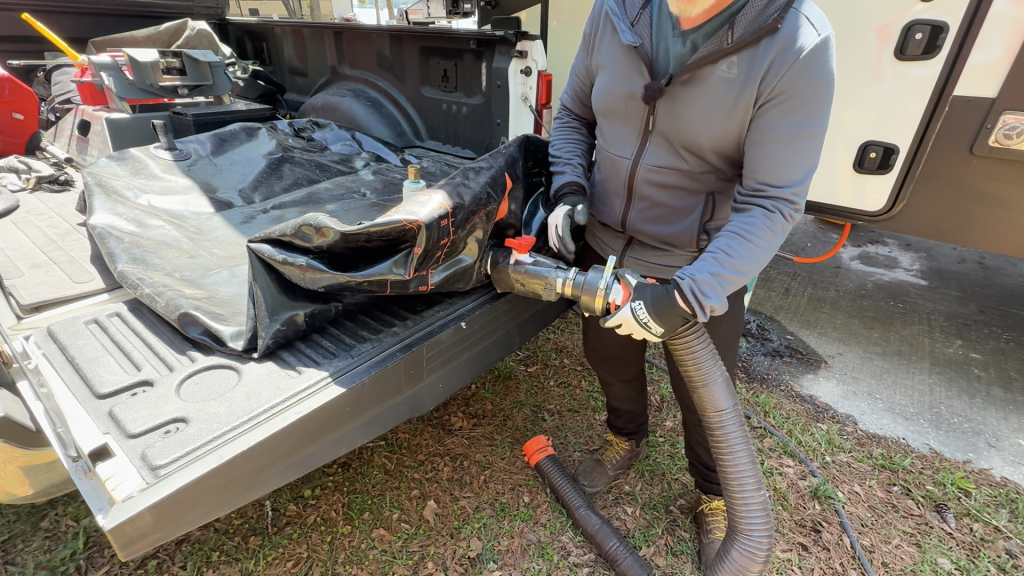
Transporting & Emptying
- Drive to dump station with the bladder secured
- Connect the drain fitting to the dump station receptacle
- Open the valve and slightly open the vent fitting for faster drainage
- Adjust straps as it empties to prevent shifting
- Takes only about 3 minutes to completely empty!
- Rinse with fresh water if desired
Common Questions Answered
“Isn’t this dangerous? What about spills?”
We’ve used this system for over a year now without any “poopsies.” The key is proper connections with pipe dope sealant and careful setup. Start with gray water first if you’re nervous!
“Where do you store it?”
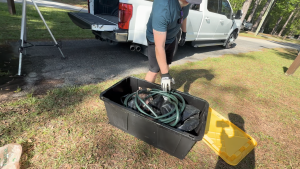 Everything collapses down into a large tote that fits behind the seat in our truck.
“How much does it cost?”
The bladder itself is significantly less expensive than traditional totes – under $60 for the 143-gallon size. Add the fittings and pump, and you’re still looking at a more economical solution, especially if you already have a macerator pump.
“How long does it take?”
About 20 minutes to fill and only 3 minutes to drain – likely less time than breaking camp, driving to the dump station, and setting up again.
The Complete Shopping List
We’ve created a dedicated Amazon list with every component needed to recreate our exact setup:
Complete Black Tank Tote Shopping List
Key components include:
- VEVOR Portable Water Storage Bladder (143-gallon capacity)
- Valterra Termination Adapter (3″ Bayonet x 3″ Male Thread)
- Macerator pump
- Various plumbing fittings (full list in our video description)
- Pipe dope sealant
- Durable garden hose
Final Thoughts: Is This For Everyone?
This system isn’t for everyone, and that’s okay! If you:
- Have a smaller RV with limited waste capacity
- Rarely boondock or stay at partial hookup sites
- Don’t mind breaking camp to visit dump stations
…then the traditional totes might be fine for your needs.
But if you:
- Love extended boondocking stays
- Have a larger RV with multiple waste tanks
- Prefer not breaking camp just to dump tanks
- Want to maximize your time enjoying beautiful locations
…then this system could be a game-changer for your RV lifestyle.
Whether you think we’re crazy or brilliant, we’re enjoying our extended boondocking experiences while others are going back and forth twice as much to dump stations!
Do you have questions about our black tank tote system? What’s your current waste management solution for boondocking? Leave a comment below!
Related Resources
- Our original black tank tote article
- Going Full-Time RV Online Course – Everything you need to know about transitioning to Full-Time RV Living with ongoing support
- Redodo Lithium Batteries – Our trusted source for boondocking power (use code LIKE for 6% off)
- NRVTA Home Study Course – Learn to fix your own RV and save money (use code LTNT30 for 30% off)